
Creating customised assessments allows educators to evaluate learning outcomes and gauge student progress accurately. While setting up a comprehensive test involves several configuration steps, mastering this workflow gives you total control over question selection, difficulty levels, and assessment schedules. We know setting up a test involves quite a few options, but once you get the hang of it, you’ll be generating targeted test papers faster than it would take to prepare them manually!
Quick Summary
Navigate to your main dashboard, configure test settings and schedules, select your chapters, and filter questions from the Simply Science question bank to publish online tests.
Step 1: Return to Your Teacher Dashboard
Start the test creation process from your central workspace.
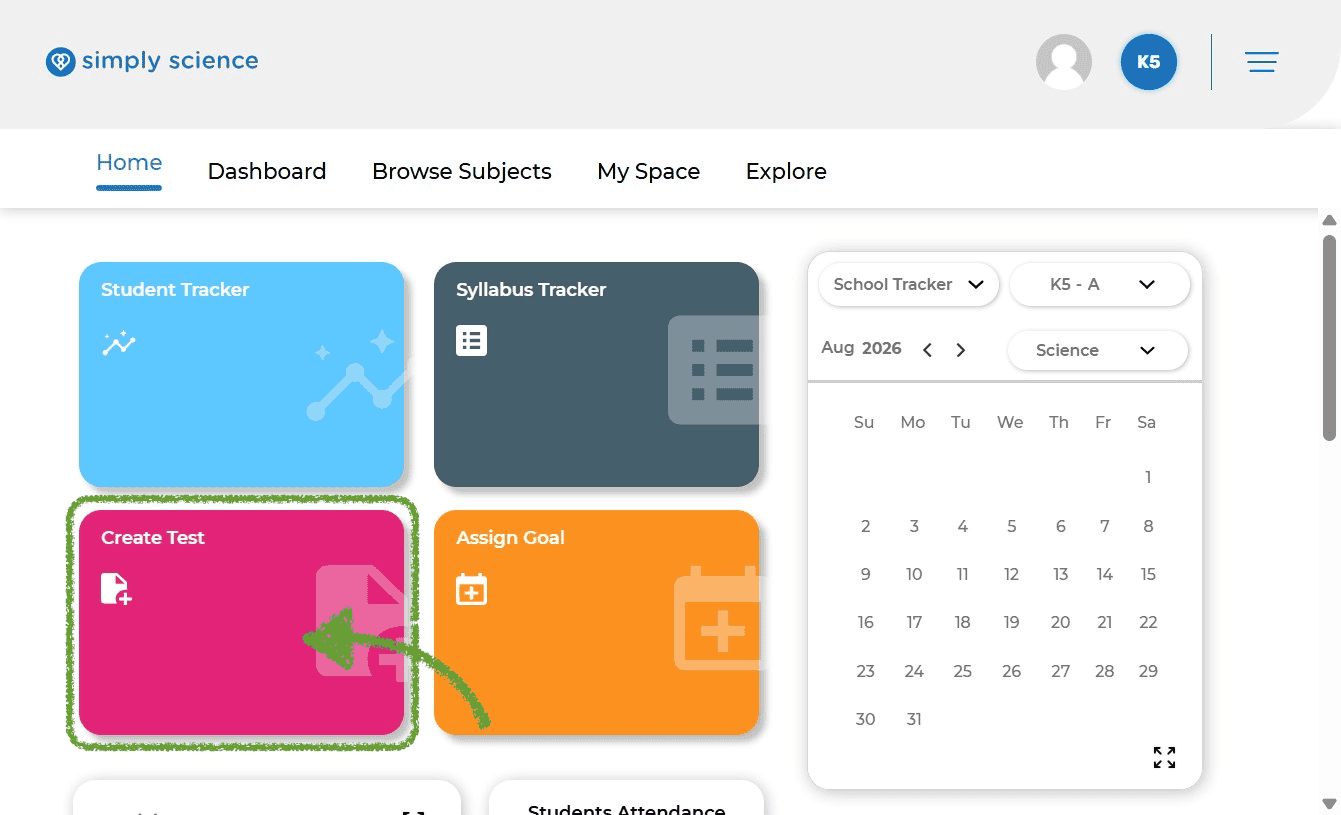
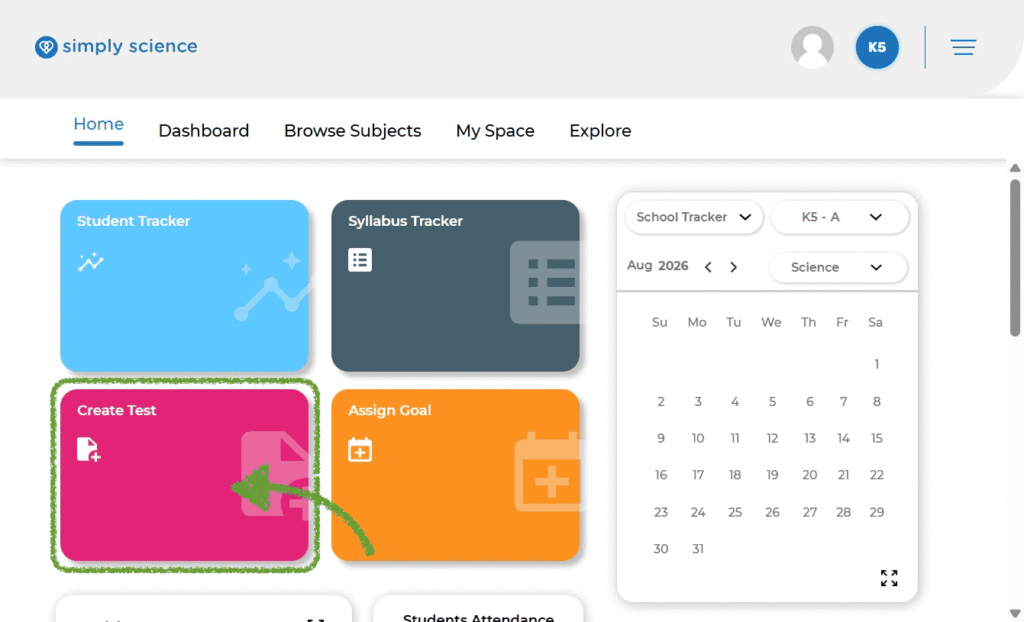
Action: Click Home in the top navigation menu.
What you will see: Your primary teacher dashboard displaying action modules.
Purpose: Returns you to the primary starting screen to launch new administrative tasks.
Step 2: Setting Parameters for the Test
Define the target audience, subject area, and test format.
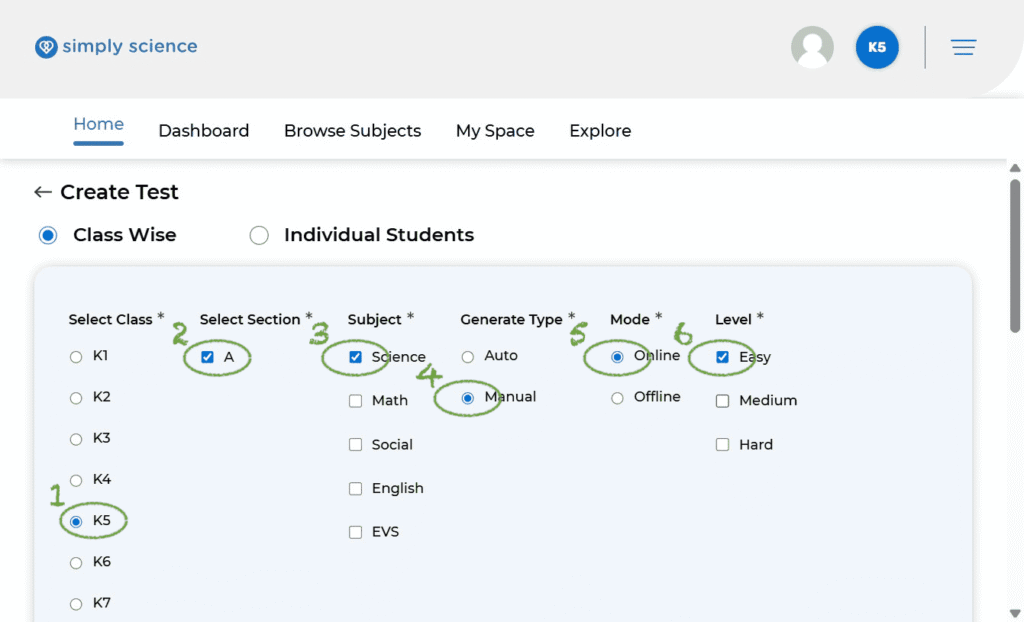
- Select Class: Click the checkbox for the target class intended for this assessment.
- Select Section: Click the “A” checkbox (or designated section letter) under Select Section.
- Select Subject: Choose your target subject (e.g., Science). This unlocks all corresponding chapters and question banks for that subject.
- Choose Generate Type: Select Auto for objective question formats or Manual for customized question picking.
- Set Delivery Mode: Select Online under Mode so students can access and complete the test directly from their student portals. Select Offline if you would like to create tests you can download and print.
- Set Difficulty Level: Choose between Easy, Medium, or Hard.
What you will see: The setup panel updates to display available question banks matching your chosen parameters.
Purpose: Establishes the foundational rules and target audience for the test.
Step 3: Set Test Details and Scheduling Window
Name your assessment and configure access dates, times, and durations.
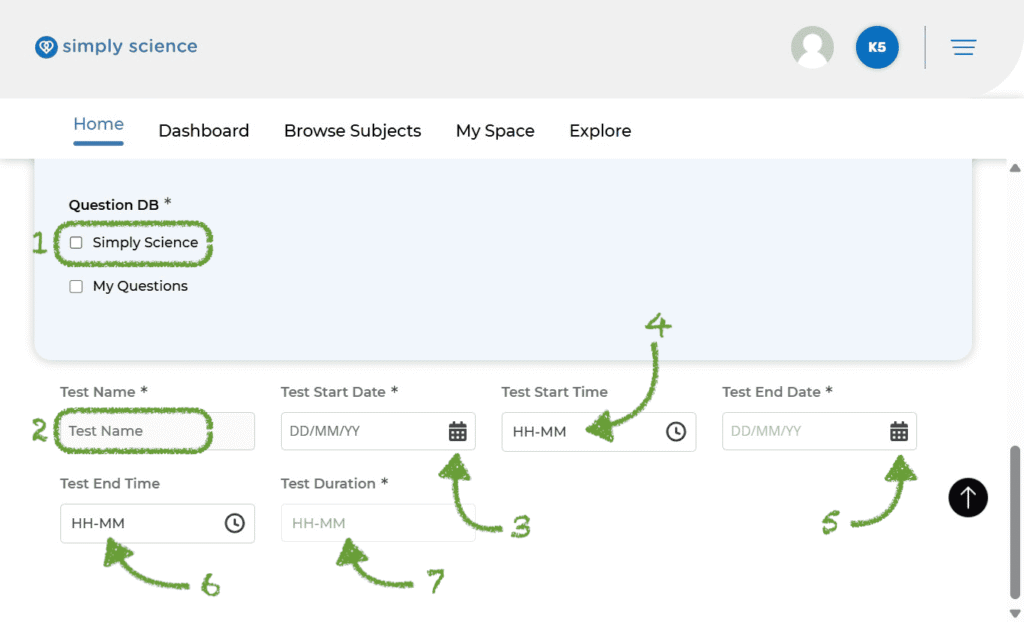
- Select Question DB: Choose Simply Science to load the LMS question bank.
- Enter Test Name: Type a clear title into the Test Name text field.
- Set Availability Window: Use the calendar and time icons to set the Start Date,
- Start Time (optional),
- End Date, and
- End Time (optional).
- Set Test Duration: Specify the timed duration (in minutes) allowed once a student begins, or set a wider date window for flexible completion over several days.
What you will see: A fully configured assessment schedule ready for chapter mapping.
Purpose: Controls when and how long students can access the online test.
Step 4: Select Chapters, Topics, and Question Quantities
Map your test directly to the chapters and topics taught in class.
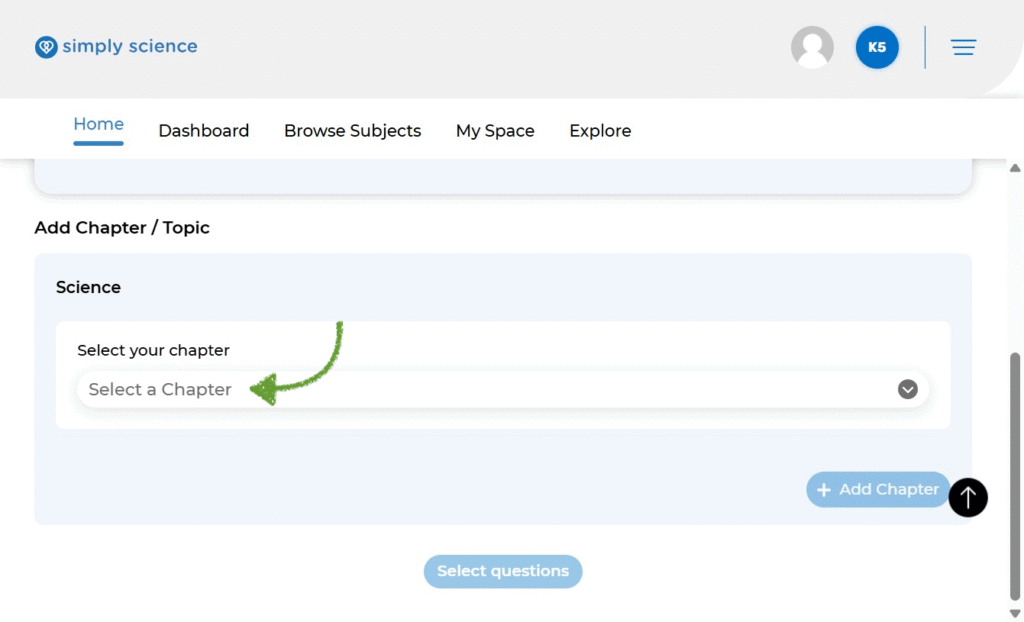
- Under the Add Chapter / Topic section, click Select a Chapter to view all chapters within your chosen subject.
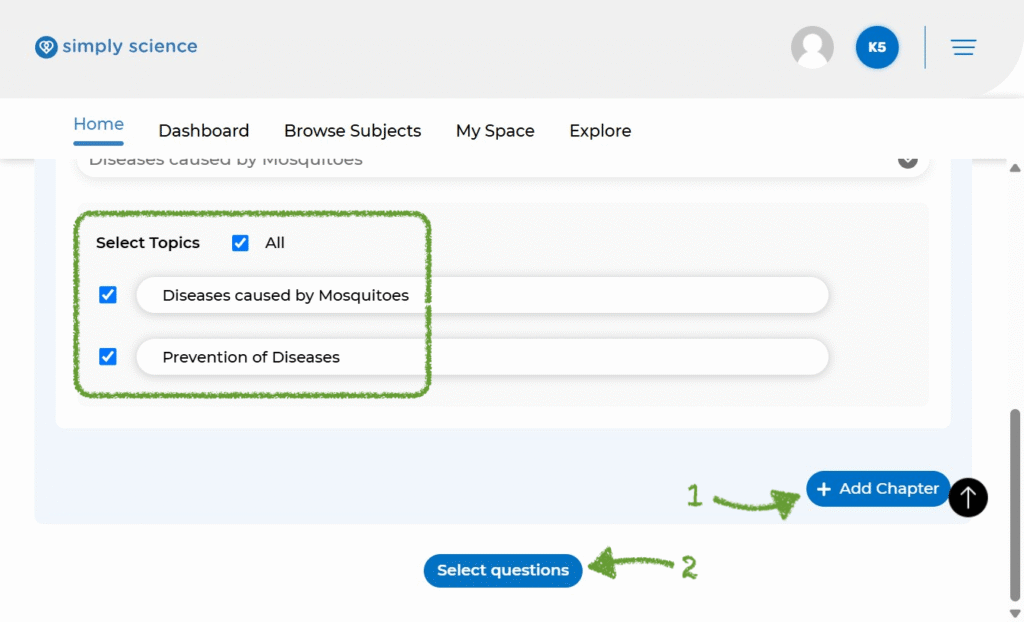
- Select specific topics within the chapter and specify the number of questions desired for each topic.
- To include more material, click the blue Add Chapter button to map additional units.
- Click Select questions to proceed to the question selection screen.
What you will see: A structured topic list showing selected chapters and allocated question counts.
Purpose: Ensures your assessment aligns directly with your intended curriculum coverage.
Step 5: Filter and Select Individual Questions
Refine your question paper using targeted filters to align with specific learning objectives.
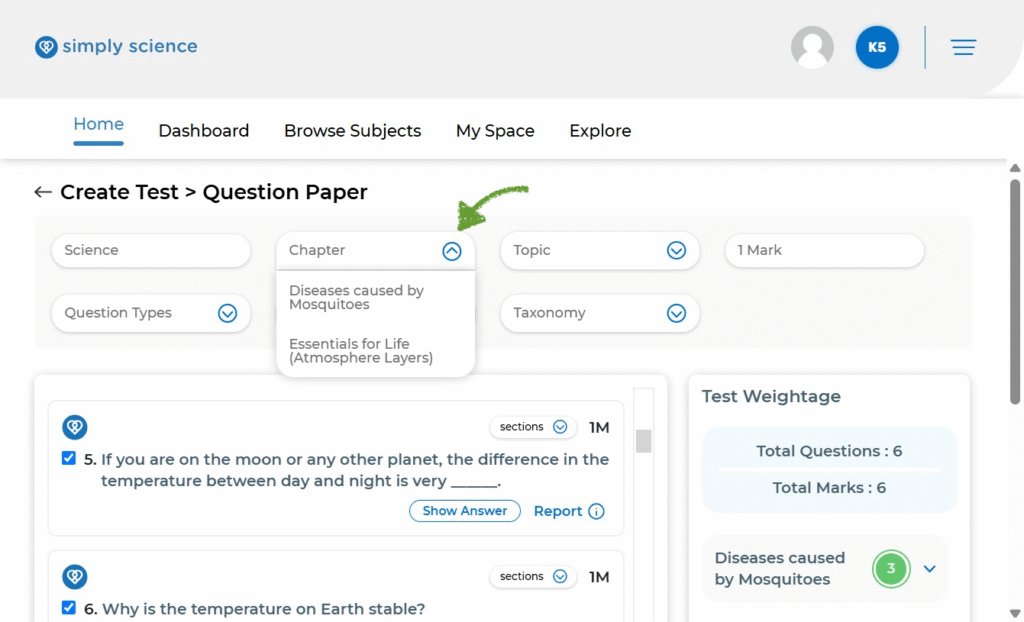
Select Questions
Click Select questions to manually pick specific items rather than relying on automatic generation.
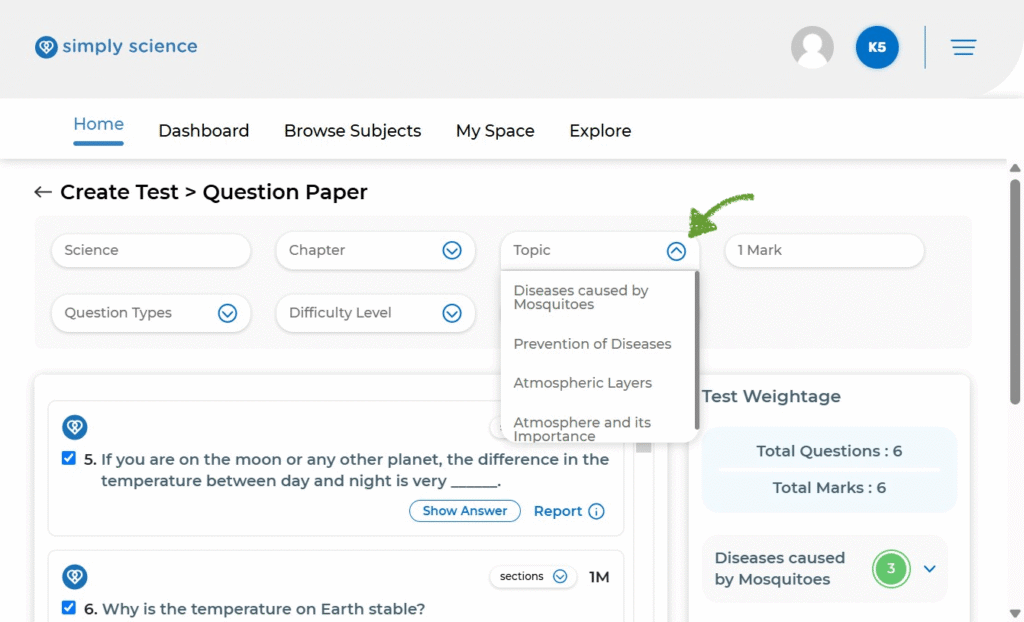
Filter Questions by Topic
Click Topic to narrow down questions to a single lesson area.
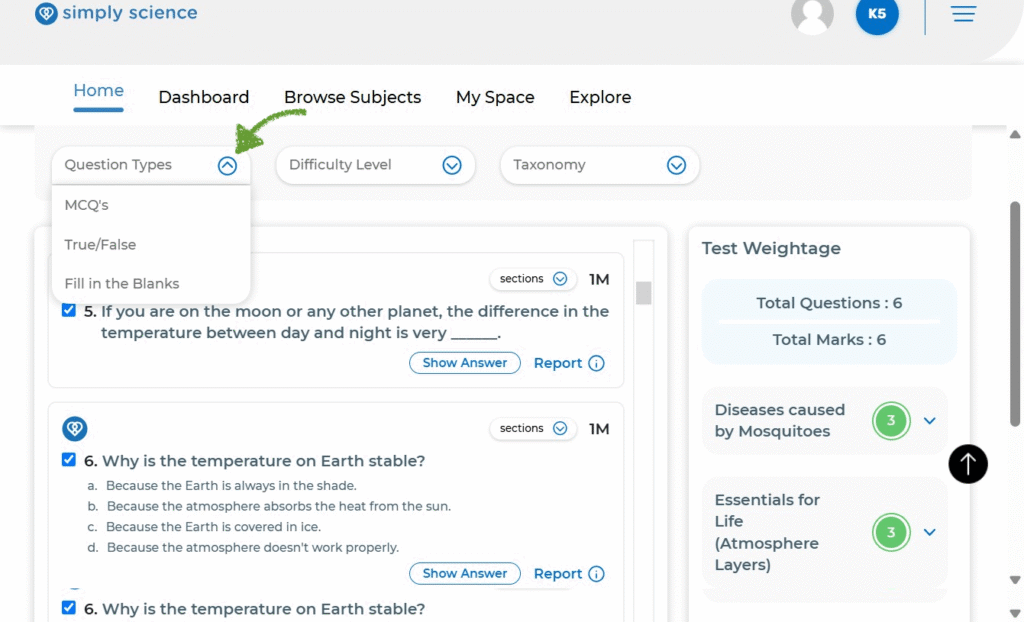
Filter Questions by Question Type
Click Question Type to isolate specific formats (e.g., MCQs, True/False, Fill-in-the-Blanks).
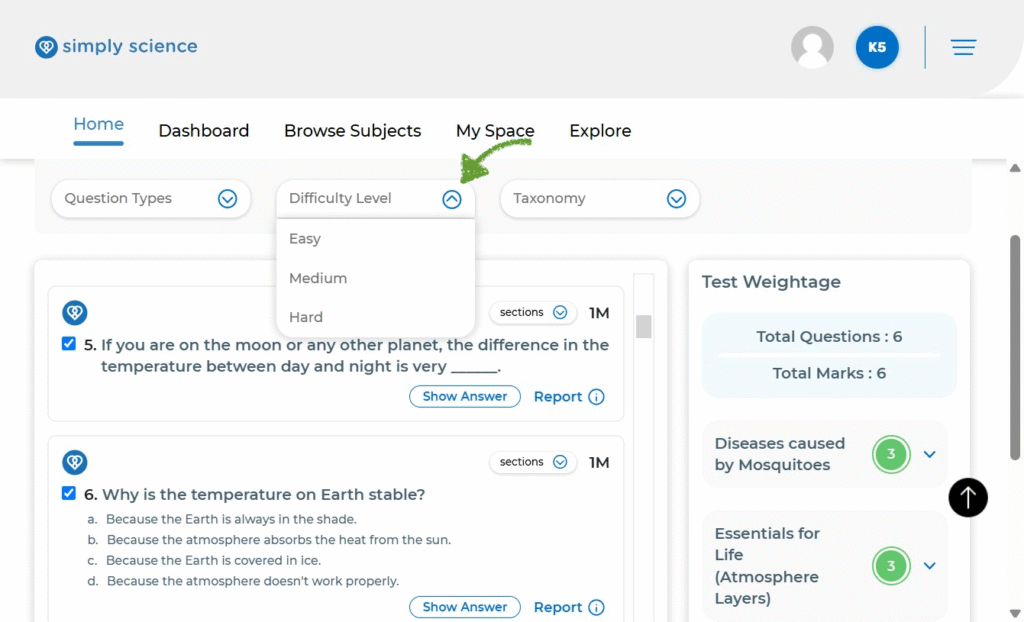
Filter Questions by Difficulty Level
Choose Difficulty Level to balance easy, medium, and challenging items.
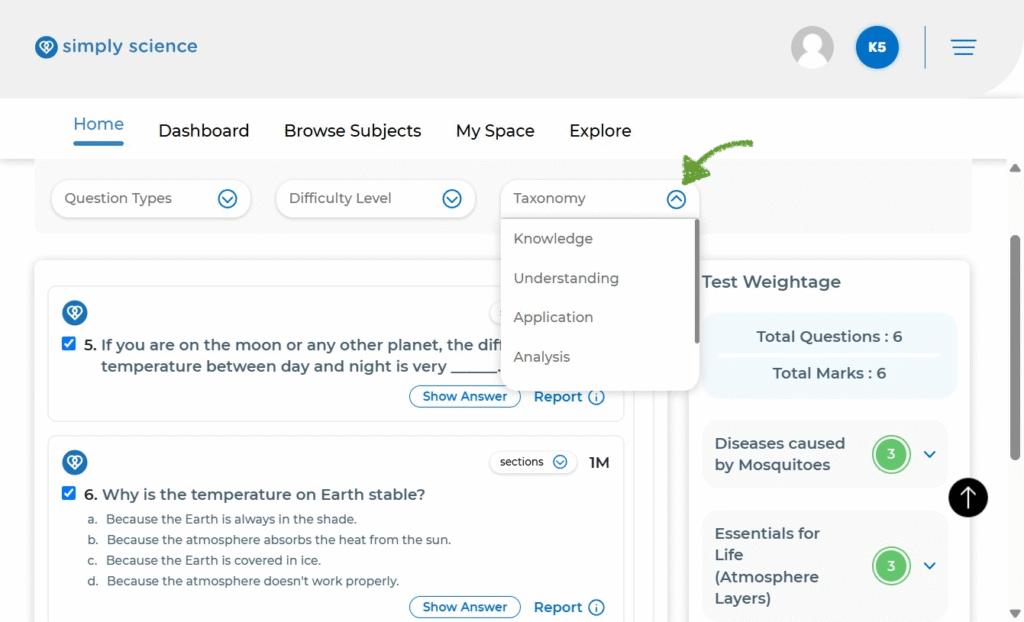
Filter Questions by Taxonomy
Select Taxonomy levels to align test items with specific cognitive skills and learning outcomes (e.g., Knowledge, Understanding, Application, Analysis).
📌 Educator Note: Though configuring parameters takes a few extra clicks during your first setup, saving test templates allows you to re-assign or tweak quizzes instantly throughout the school year!
Step 6: Select Your Test Questions
Manually review and select specific questions to build your customised question paper.
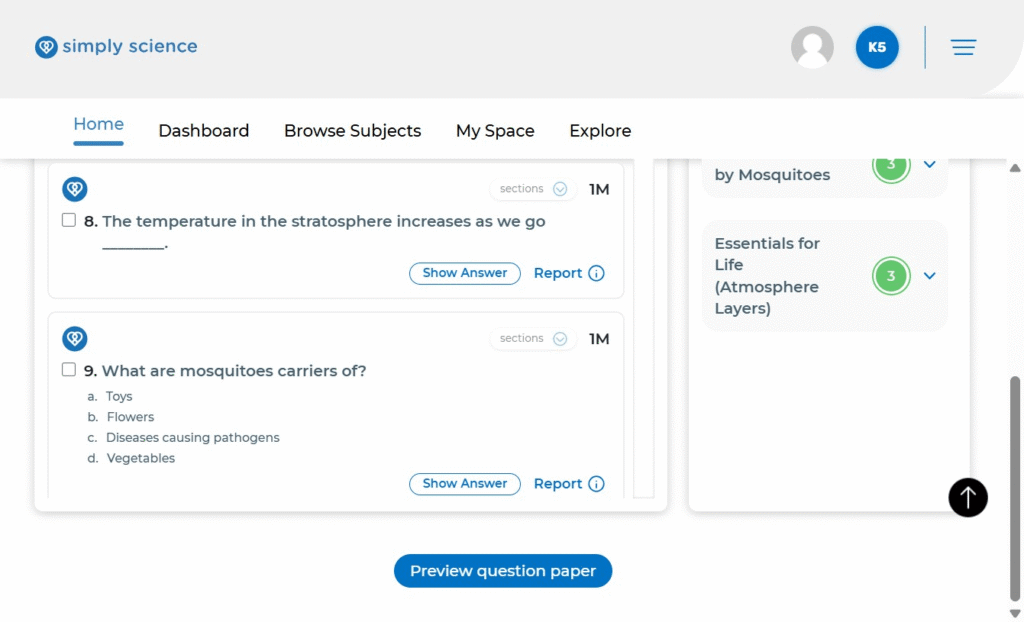
Action: Check the individual selection boxes next to the questions you wish to include in your assessment.
What you will see: Checkmarks appear next to chosen questions, and the total question count updates dynamically.
Purpose: Ensures complete control over which specific questions make it onto your test paper.
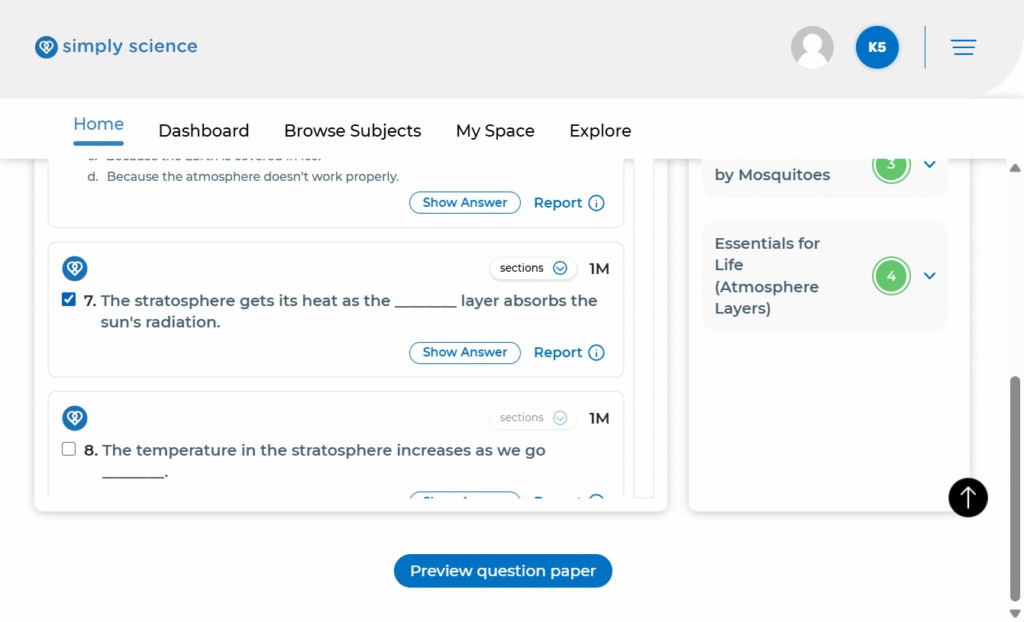
Step 7: Preview the Test Paper
Review the layout and question flow before final generation.
Action: Click the blue Preview question paper button at the bottom of the screen.
What you will see: A structured preview displaying all selected questions, option choices, and mark allocations.
Purpose: Allows you to verify test accuracy, question ordering, and formatting before publishing.
Step 8: Confirm and Generate the Test
Finalize your assessment details and trigger document creation.
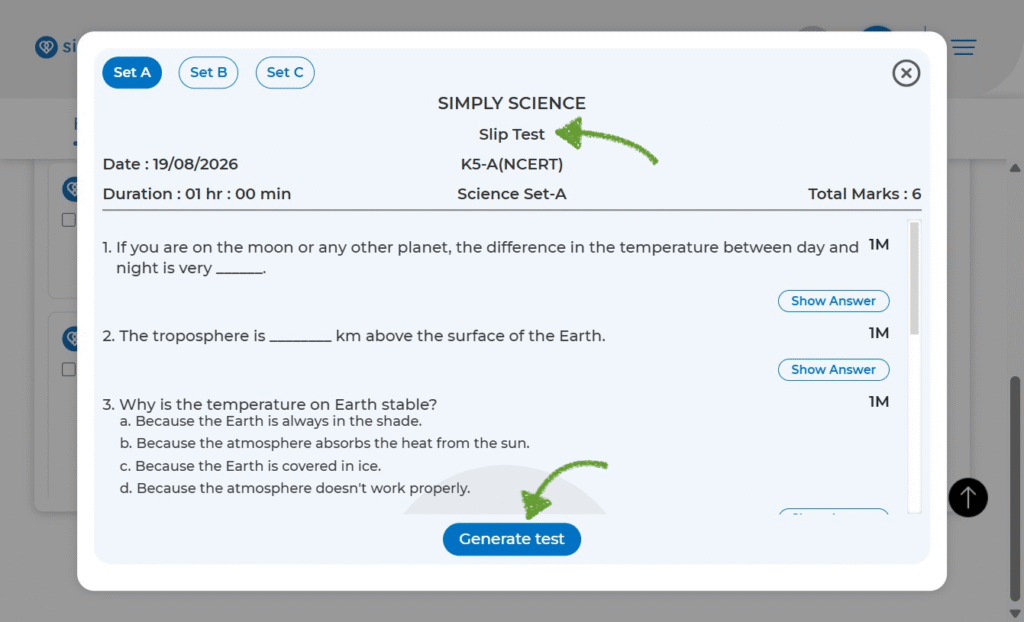
- Confirm Test Title: Review the test details (such as Slip Test) at the top of the preview window to ensure you are finalizing the correct assessment.
- Generate Document: Click the blue Generate test button at the bottom of the preview window.
Purpose: Creates the official test paper ready for digital distribution or printing.
What you will see: The system processes your selection and generates the final test document.
Step 9: Print or Download Hard Copy Versions
Generate student question papers or teacher answer keys for offline paper-based testing.
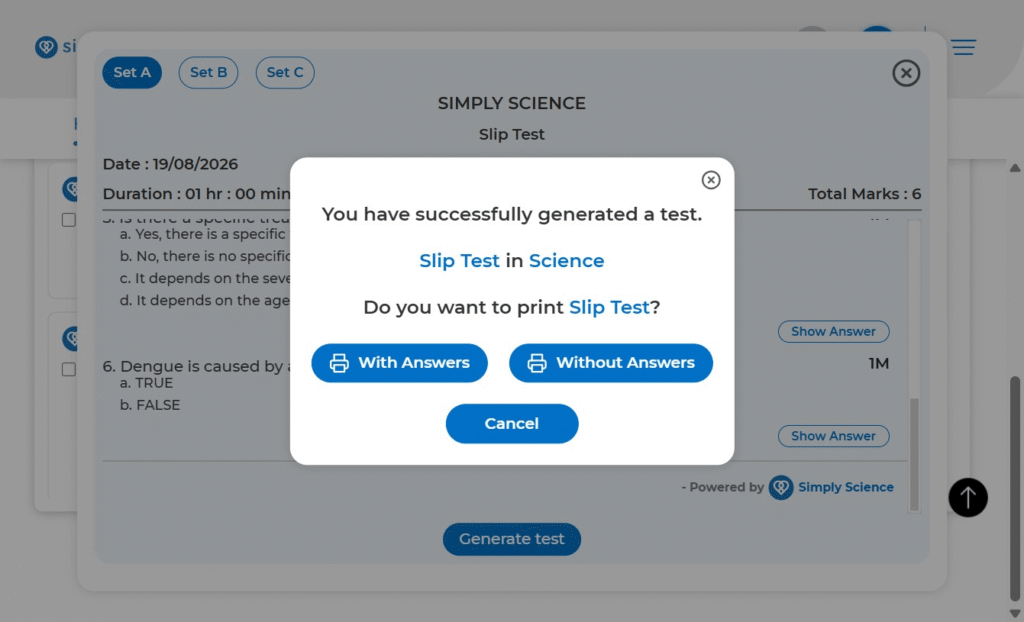
Purpose: Produces student-ready test copies (Without Answers) or complete answer keys (With Answers) for rapid offline grading.
Action: When the print prompt appears, select either With Answers or Without Answers.
What you will see: The system generates a clean, formatted PDF version of the test paper.
📌 Educator Note: You can print paper copies for physical classroom exams while simultaneously publishing the digital version online for absent students or homework revision!