
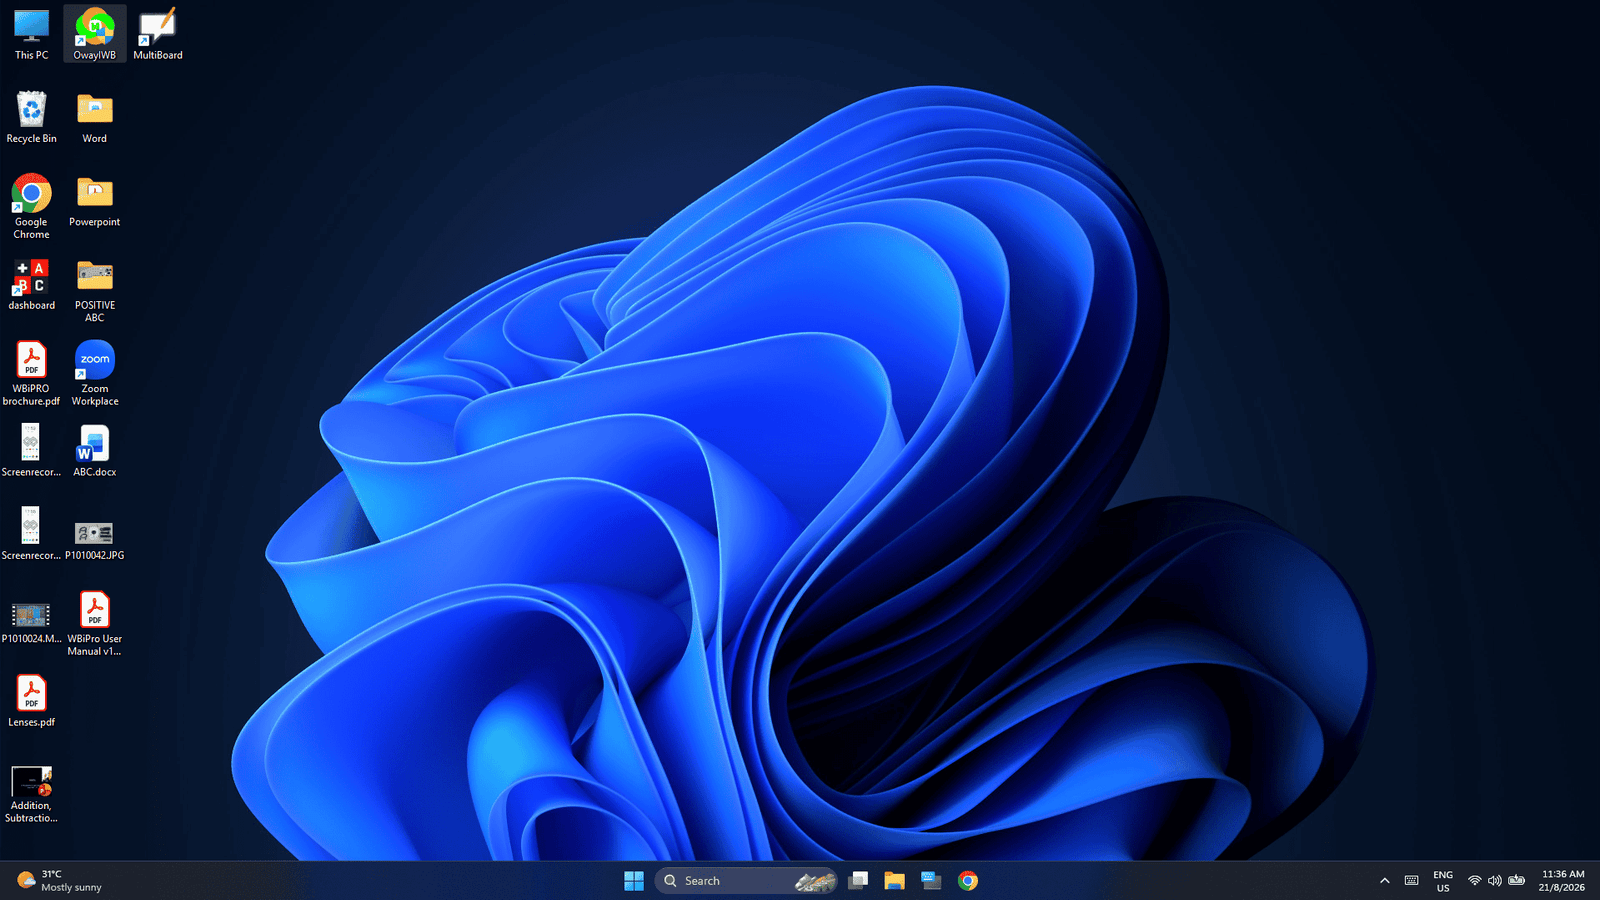
When connecting your WBiPro projector to a Windows laptop, precise infrared tracking ensures your ePen lines up perfectly with your digital ink. Follow this quick workflow to launch the calibration utility from your desktop.
Before diving into configuration, complete your initial setup using our companion guides:
- Review initial setup steps in the WBiPro System Overview & Quick Start Guide.
- Need laptop connection help? Check out the WBiPro Setup Guide.
- Explore the presentation suite in the WBiPro MultiBoard Software Guide for Windows.
Quick Selection Guide: Which Calibration Method Do You Need?
Before you begin, choose the calibration path that matches your current setup needs:
- Option 1: Auto Calibration (Recommended for Daily Use) — Select this for a rapid, automated sync that takes less than 5 seconds. Perfect for routine classroom setups where the projector has not been physically moved.
- Option 2: 4or 15-Point Manual Calibration (Recommended for Precision Setup) — Select this if you notice cursor drift, offset tracking, or if you have recently adjusted the projector’s position.
Option 1: Windows Auto Calibration Guide
Step 1: Find and Open the Application
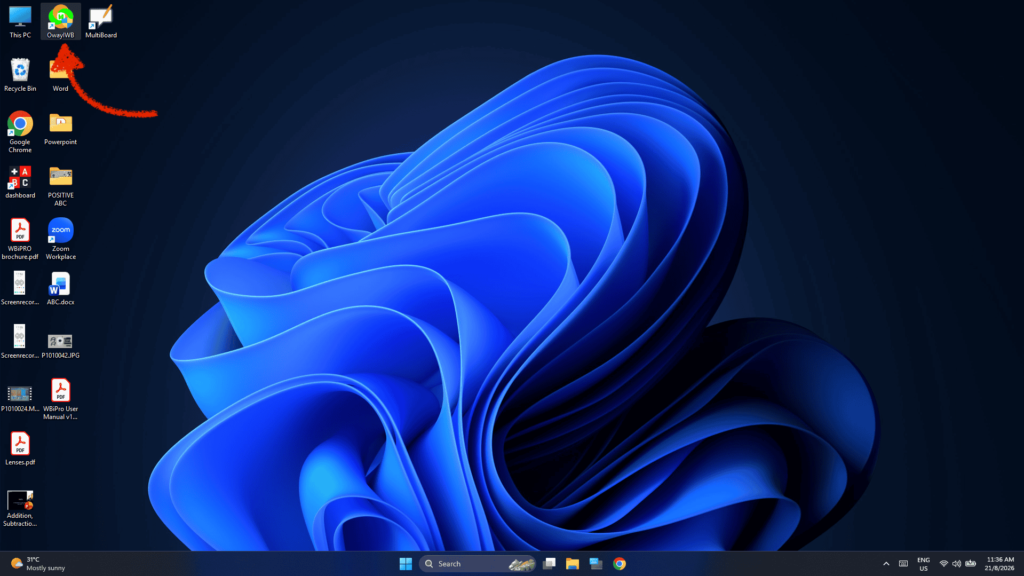
- Desktop Shortcut: After installing the software, locate the OwayIWB application icon directly on your Windows desktop screen.
- Launch Utility: Double-click the icon to initiate the software backend required for infrared stylus tracking.
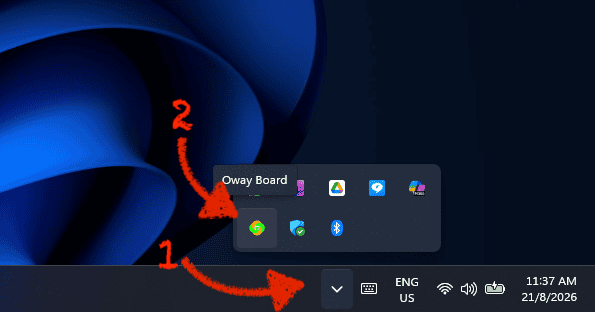
Step 2: Look for the Application in the System Tray
- Tray Access: If the application is already running in the background, click the upward arrow chevron in the Windows taskbar system tray.
- Oway Board Icon: Look for the green and orange Oway Board icon hidden among your active background utilities.
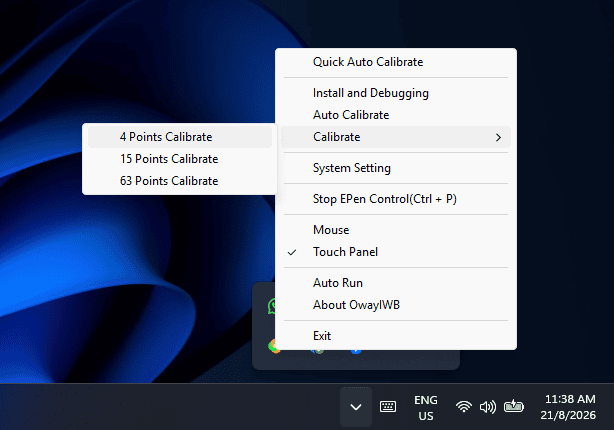
Step 3: Initiate Quick Auto Calibrate
- Open Menu: Right-click the Oway Board tray icon to reveal the control menu.
- Navigate Options: Click on Quick Auto Calibrate menu option.
- Calibration: Wait for a few seconds for the auto calibration to complete.
Option 2: Windows Manual Calibration Guide
Step 1: Find and Open the Application
- Desktop Shortcut: After installing the software, locate the OwayIWB application icon directly on your Windows desktop screen.
- Launch Utility: Double-click the icon to initiate the software backend required for infrared stylus tracking.
Step 2: Look for the Application in the System Tray
- Tray Access: If the application is already running in the background, click the upward arrow chevron in the Windows taskbar system tray.
- Oway Board Icon: Look for the green and orange Oway Board icon hidden among your active background utilities.
Step 3: Click on 4 Point Calibration
- Open Menu: Right-click the Oway Board tray icon to reveal the control menu.
- Navigate Options: Hover over the Calibrate sub-menu option.
- Select 4 Points Calibrate: Choose 4 Points Calibrate from the dropdown list to initiate the precision alignment sequence across your projected display.